Snikket is a server side software for XMPP chat communications. This guide is for anyone who wants to set up a Snikket server behind nginx. The operating system on the server is debian in my case. My guide is based on the official guide.
Run all the commands mentioned below as root.
Point your domain to server’s IP address
Install curl for debian
apt install curl
Now run:
curl -4 ifconfig.co
The output of the previous command is the IP Address of the server you are using.
Create an A record corresponding to the domain you want to use. Since I have domain ravidwivedi.in, I will deploy my chat server at the subdomain chat.ravidwivedi.in.
Create CNAME records for groups.chat.ravidwivedi.in and share.chat.ravidwivedi.in so that they point to chat.ravidwivedi.in
Open required ports
Open required ports if you are behind a firewall like ufw. The official Snikket docs list which ones you have to allow.
Docker and snikket configuration
Install docker and docker-compose packages on your server. The commands for debian are:
apt install docker docker-compose
Snikket configuration
Create a snikket config file and download docker-compose.yml file prepared by the Snikket project.
mkdir /etc/snikket
cd /etc/snikket
curl -o docker-compose.yml https://snikket.org/service/resources/docker-compose.beta.yml
Create a file named snikket.conf in the /etc/snikket directory with the following contents (replace appropriate fields according to your domain and email):
# The primary domain of your Snikket instance
SNIKKET_DOMAIN=chat.ravidwivedi.in

# An email address where the admin can be contacted
# (also used to register your Let's Encrypt account to obtain certificates)
SNIKKET_ADMIN_EMAIL=your-email@ravidwivedi.in
Nginx config and HTTPS
For nginx setup, we follow Snikket project’s reverse proxy docs. We will also setup HTTPS certificates using certbot. Let’s install nginx and certbot:
apt install nginx python3-certbot-nginx
Obtain certificates for all the subdomains
certbot certonly --standalone -d share.chat.ravidwivedi.in -d groups.chat.ravidwivedi.in -d chat.ravidwivedi.in
The output for me was:
Successfully received certificate.
Certificate is saved at: /etc/letsencrypt/live/chat.ravidwivedi.in/fullchain.pem
Key is saved at:         /etc/letsencrypt/live/chat.ravidwivedi.in/privkey.pem
This certificate expires on 2023-10-23.
These files will be updated when the certificate renews.
Certbot has set up a scheduled task to automatically renew this certificate in the background.

- - - - - - - - - - - - - - - - - - - - - - - - - - - - - - - - - - - - - - - -
If you like Certbot, please consider supporting our work by:
 * Donating to ISRG / Let's Encrypt:   https://letsencrypt.org/donate
 * Donating to EFF:                    https://eff.org/donate-le
- - - - - - - - - - - - - - - - - - - - - - - - - - - - - - - - - - - - - - - -
We want nginx to listen at ports 80 and 443. So, let’s direct Snikket to bind to ports 5080 and 5443 to avoid conflict with nginx. To do this, add these lines to /etc/snikket/snikket.conf:
SNIKKET_TWEAK_HTTP_PORT=5080
SNIKKET_TWEAK_HTTPS_PORT=5443
Now create a file /etc/nginx/sites-available/chat.ravidwivedi.in and add the following contents to it, followed by replacing ravidwivedi.in with your domain name and specifying correct ssl_certificate path to the location of your certificates.
server {
  # Accept HTTP connections
  listen 80;
  listen [::]:80;

  server_name chat.ravidwivedi.in;
  server_name groups.chat.ravidwivedi.in;
  server_name share.chat.ravidwivedi.in;

  location / {
      proxy_pass http://localhost:5080/;
      proxy_set_header      Host              $host;
      proxy_set_header      X-Forwarded-For   $proxy_add_x_forwarded_for;

      # This is the maximum size of uploaded files in Snikket
      client_max_body_size 104857616; # 100MB + 16 bytes
  }
}

server {
  # Accept HTTPS connections
  listen [::]:443 ssl ipv6only=on;
  listen 443 ssl;
  ssl_certificate /path/to/certificate.pem;
  ssl_certificate_key /path/to/key.pem;

  server_name chat.ravidwivedi.in;
  server_name groups.chat.ravidwivedi.in;
  server_name share.chat.ravidwivedi.in;

  location / {
      proxy_pass https://localhost:5443/;
      proxy_set_header      Host              $host;
      proxy_set_header      X-Forwarded-For   $proxy_add_x_forwarded_for;
      # REMOVE THIS IF YOU CHANGE `localhost` TO ANYTHING ELSE ABOVE
      proxy_ssl_verify      off;
      proxy_set_header      X-Forwarded-Proto https;
      proxy_ssl_server_name on;

      # This is the maximum size of uploaded files in Snikket
      client_max_body_size 104857616; # 100MB + 16 bytes

      # For BOSH and WebSockets
      proxy_set_header Connection $http_connection;
      proxy_set_header Upgrade $http_upgrade;
      proxy_read_timeout 900s;

  }
}
In the above config, we need to specify path to our certificates created by certbot in an earlier step of this guide. Locate the following lines:
ssl_certificate /path/to/certificate.pem;
ssl_certificate_key /path/to/key.pem;
The output of my certbot command earlier told me that the certificates are at /etc/letsencrypt/live/chat.ravidwivedi.in/fullchain.pem and ssl_key is at /etc/letsencrypt/live/chat.ravidwivedi.in/privkey.pem
So we change the above mentioned two lines in the nginx config at /etc/nginx/sites-available/chat.ravidwivedi.in to:
ssl_certificate /etc/letsencrypt/live/chat.ravidwivedi.in/fullchain.pem;
ssl_certificate_key /etc/letsencrypt/live/chat.ravidwivedi.in/privkey.pem;
After making these changes to file, save it. Now, create symlink to /etc/nginx/sites-enabled/chat.ravidwivedi.in file by running the command:
ln -s /etc/nginx/sites-available/chat.ravidwivedi.in /etc/nginx/sites-enabled/chat.ravidwivedi.in
Restart nginx:
systemctl restart nginx
You can also check if nginx syntax is correct by running
nginx -t
If the output of this command indicates an error, you need to fix that error before moving on.
Launch Snikket
Go back into /etc/snikket directory by running:
cd /etc/snikket
Now run:
docker-compose up -d
After the command run is complete, visit chat.ravidwivedi.in and you will see a login page as in the screenshot below.
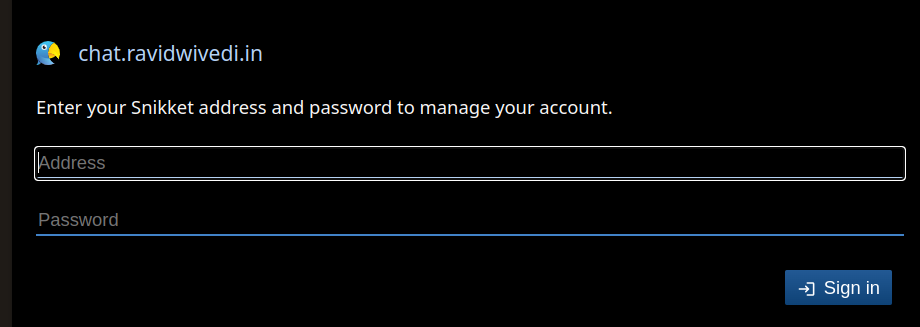
If you don’t see this login page, there is some error in your setup.
If you are able to see that login page, create an account with admin privileges by running the command:
docker exec snikket create-invite --admin --group default
Post install
Snikket project has a page mentioning additional lines you can add to your snikket config file, like for example, setting limit on size of each attachment. Also, check out the upgrade page on how to keep snikket software updated.
If you are using Snikket, be sure to donate to the Snikket project to support them.