Motivation
On the 8th of August 2025 (a day before the Debian Trixie release), I was upgrading my personal laptop from Debian Bookworm to Trixie. It was a major update. However, the update didn’t go smoothly, and I ran into some errors. From the Debian support IRC channel, I got to know that it would be best if I removed the texlive packages.
However, it was not so easy to just remove texlive with a simple apt remove command. I had to remove the texlive packages from /usr/bin. Then I ran into other errors. Hours after I started the upgrade, I realized I preferred having my system as it was before, as I had to travel to Noida the next day. Needless to say, I wanted to go to sleep rather than fix my broken system. Only if I had a way to go back to my system before I started upgrading, it would have saved a lot of trouble for me. I ended up installing Trixie from scratch.
It turns out that there was a way to recover to the state before the upgrade - using Timeshift to roll back the system to a state (in our example, it is the state before the upgrade process started) in the past. However, it needs the Btrfs filesystem with appropriate subvolumes, not provided by Debian installer in their guided partitioning menu.
I have set it up after a few weeks of the above-mentioned incident. Let me demonstrate how it works.

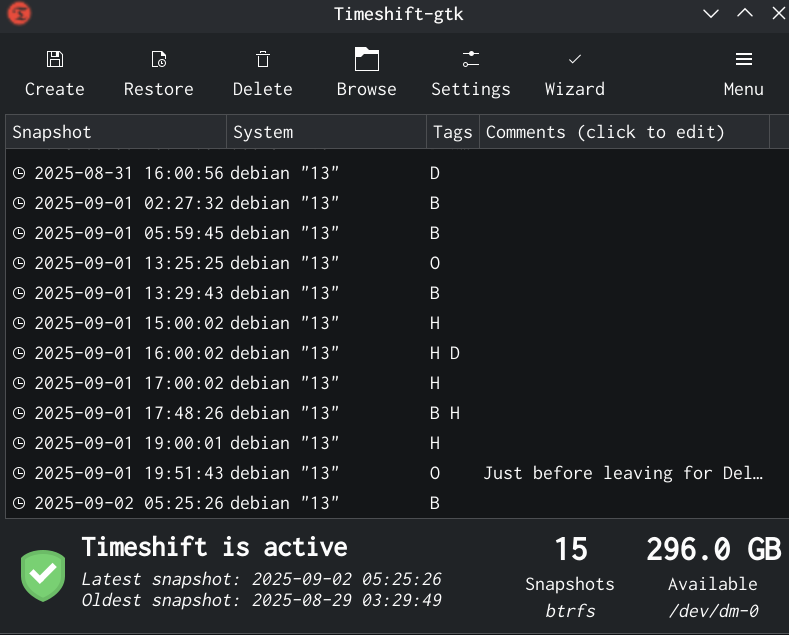
Check the screenshot above. It shows a list of snapshots made by Timeshift. Some of them were made by me manually. Others were made by Timeshift automatically as per the routine - I have set up hourly backups and weekly backups etc.
In the above-mentioned major update, I could have just taken a snapshot using Timeshift before performing the upgrade and could have rolled back to that snapshot when I found that I cannot spend more time on fixing my installation errors. Then I could just perform the upgrade later.
Installation
In this tutorial, I will cover how I installed Debian with Btrfs and disk encryption, along with creating subvolumes @ for root and @home for /home so that I can use Timeshift to create snapshots. These snapshots are kept on the same disk where Debian is installed, and the use-case is to roll back to a working system in case I mess up something or to recover an accidentally deleted file.
I went through countless tutorials on the Internet, but I didn’t find a single tutorial covering both the disk encryption and the above-mentioned subvolumes (on Debian). Debian doesn’t create the desired subvolumes by default, therefore the process requires some manual steps, which beginners may not be comfortable performing. Beginners can try distros such as Fedora and Linux Mint, as their installation includes Btrfs with the required subvolumes.
Furthermore, it is pertinent to note that I used Debian Trixie’s DVD iso on a real laptop (not a virtual machine) for my installation. Debian Trixie is the codename for the current stable version of Debian. Then I took screenshots in a virtual machine by repeating the process. Moreover, a couple of screenshots are from the installation I did on the real laptop.
Let’s start the tutorial by booting up the Debian installer.

The above screenshot shows the first screen we see on the installer. Since we want to choose Expert Install, we select Advanced Options in the screenshot above.

Let’s select the Expert Install option in the above screenshot. It is because we want to create subvolumes after the installer is done with the partition, and only then proceed to installing the base system. “Non-expert” install modes proceed directly to installing the system right after creating partitions without pausing for us to create the subvolumes.

After selecting the Expert Install option, you will get the screen above. I will skip to partitioning from here and leave the intermediate steps such as choosing language, region, connecting to Wi-Fi, etc. For your reference, I did create the root user.

Let’s jump right to the partitioning step. Select the Partition disks option from the menu as shown above.

Choose Manual.

Select your disk where you would like to install Debian.

Select Yes when asked for creating a new partition.

I chose the msdos option as I am not using UEFI. If you are using UEFI, then you need to choose the gpt option. Also, your steps will (slightly) differ from mine if you are using UEFI. In that case, you can watch this video by the YouTube channel EF Linux in which he creates an EFI partition. As he doesn’t cover disk encryption, you can continue reading this post after following the steps corresponding to EFI.

Select the free space option as shown above.

Choose Create a new partition.

I chose the partition size to be 1 GB.

Choose Primary.

Choose Beginning.

Now, I got to this screen.

I changed mount point to /boot and turned on the bootable flag and then selected “Done setting up the partition.”

Now select free space.

Choose the Create a new partition option.

I made the partition size equal to the remaining space on my disk. I do not intend to create a swap partition, so I do not need more space.

Select Primary.

Select the Use as option to change its value.

Select “physical volume for encryption.”

Select Done setting up the partition.

Now select “Configure encrypted volumes.”

Select Yes.

Select Finish.

Selecting Yes will take a lot of time to erase the data. Therefore, I would say if you have hours for this step (in case your SSD is like 1 TB), then I would recommend selecting “Yes.” Otherwise, you could select “No” and compromise on the quality of encryption.
After this, you will be asked to enter a passphrase for disk encryption and confirm it. Please do so. I forgot to take the screenshot for that step.

Now select that encrypted volume as shown in the screenshot above.

Here we will change a couple of options which will be shown in the next screenshot.

In the Use as menu, select “btrfs journaling file system.”

Now, click on the mount point option.

Change it to “/ - the root file system.”

Select Done setting up the partition.

This is a preview of the paritioning after performing the above-mentioned steps.

If everything is okay, proceed with the Finish partitioning and write changes to disk option.

The installer is reminding us to create a swap partition. I proceeded without it as I planned to add swap after the installation.

If everything looks fine, choose “yes” for writing the changes to disks.

Now we are done with partitioning and we are shown the screen in the screenshot above. If we had not selected the Expert Install option, the installer would have proceeded to install the base system without asking us.
However, we want to create subvolumes before proceeding to install the base system. This is the reason we chose Expert Install.
Now press Ctrl + F2.

You will see the screen as in the above screenshot. It says “Please press Enter to activate this console.” So, let’s press Enter.

After pressing Enter, we see the above screen.

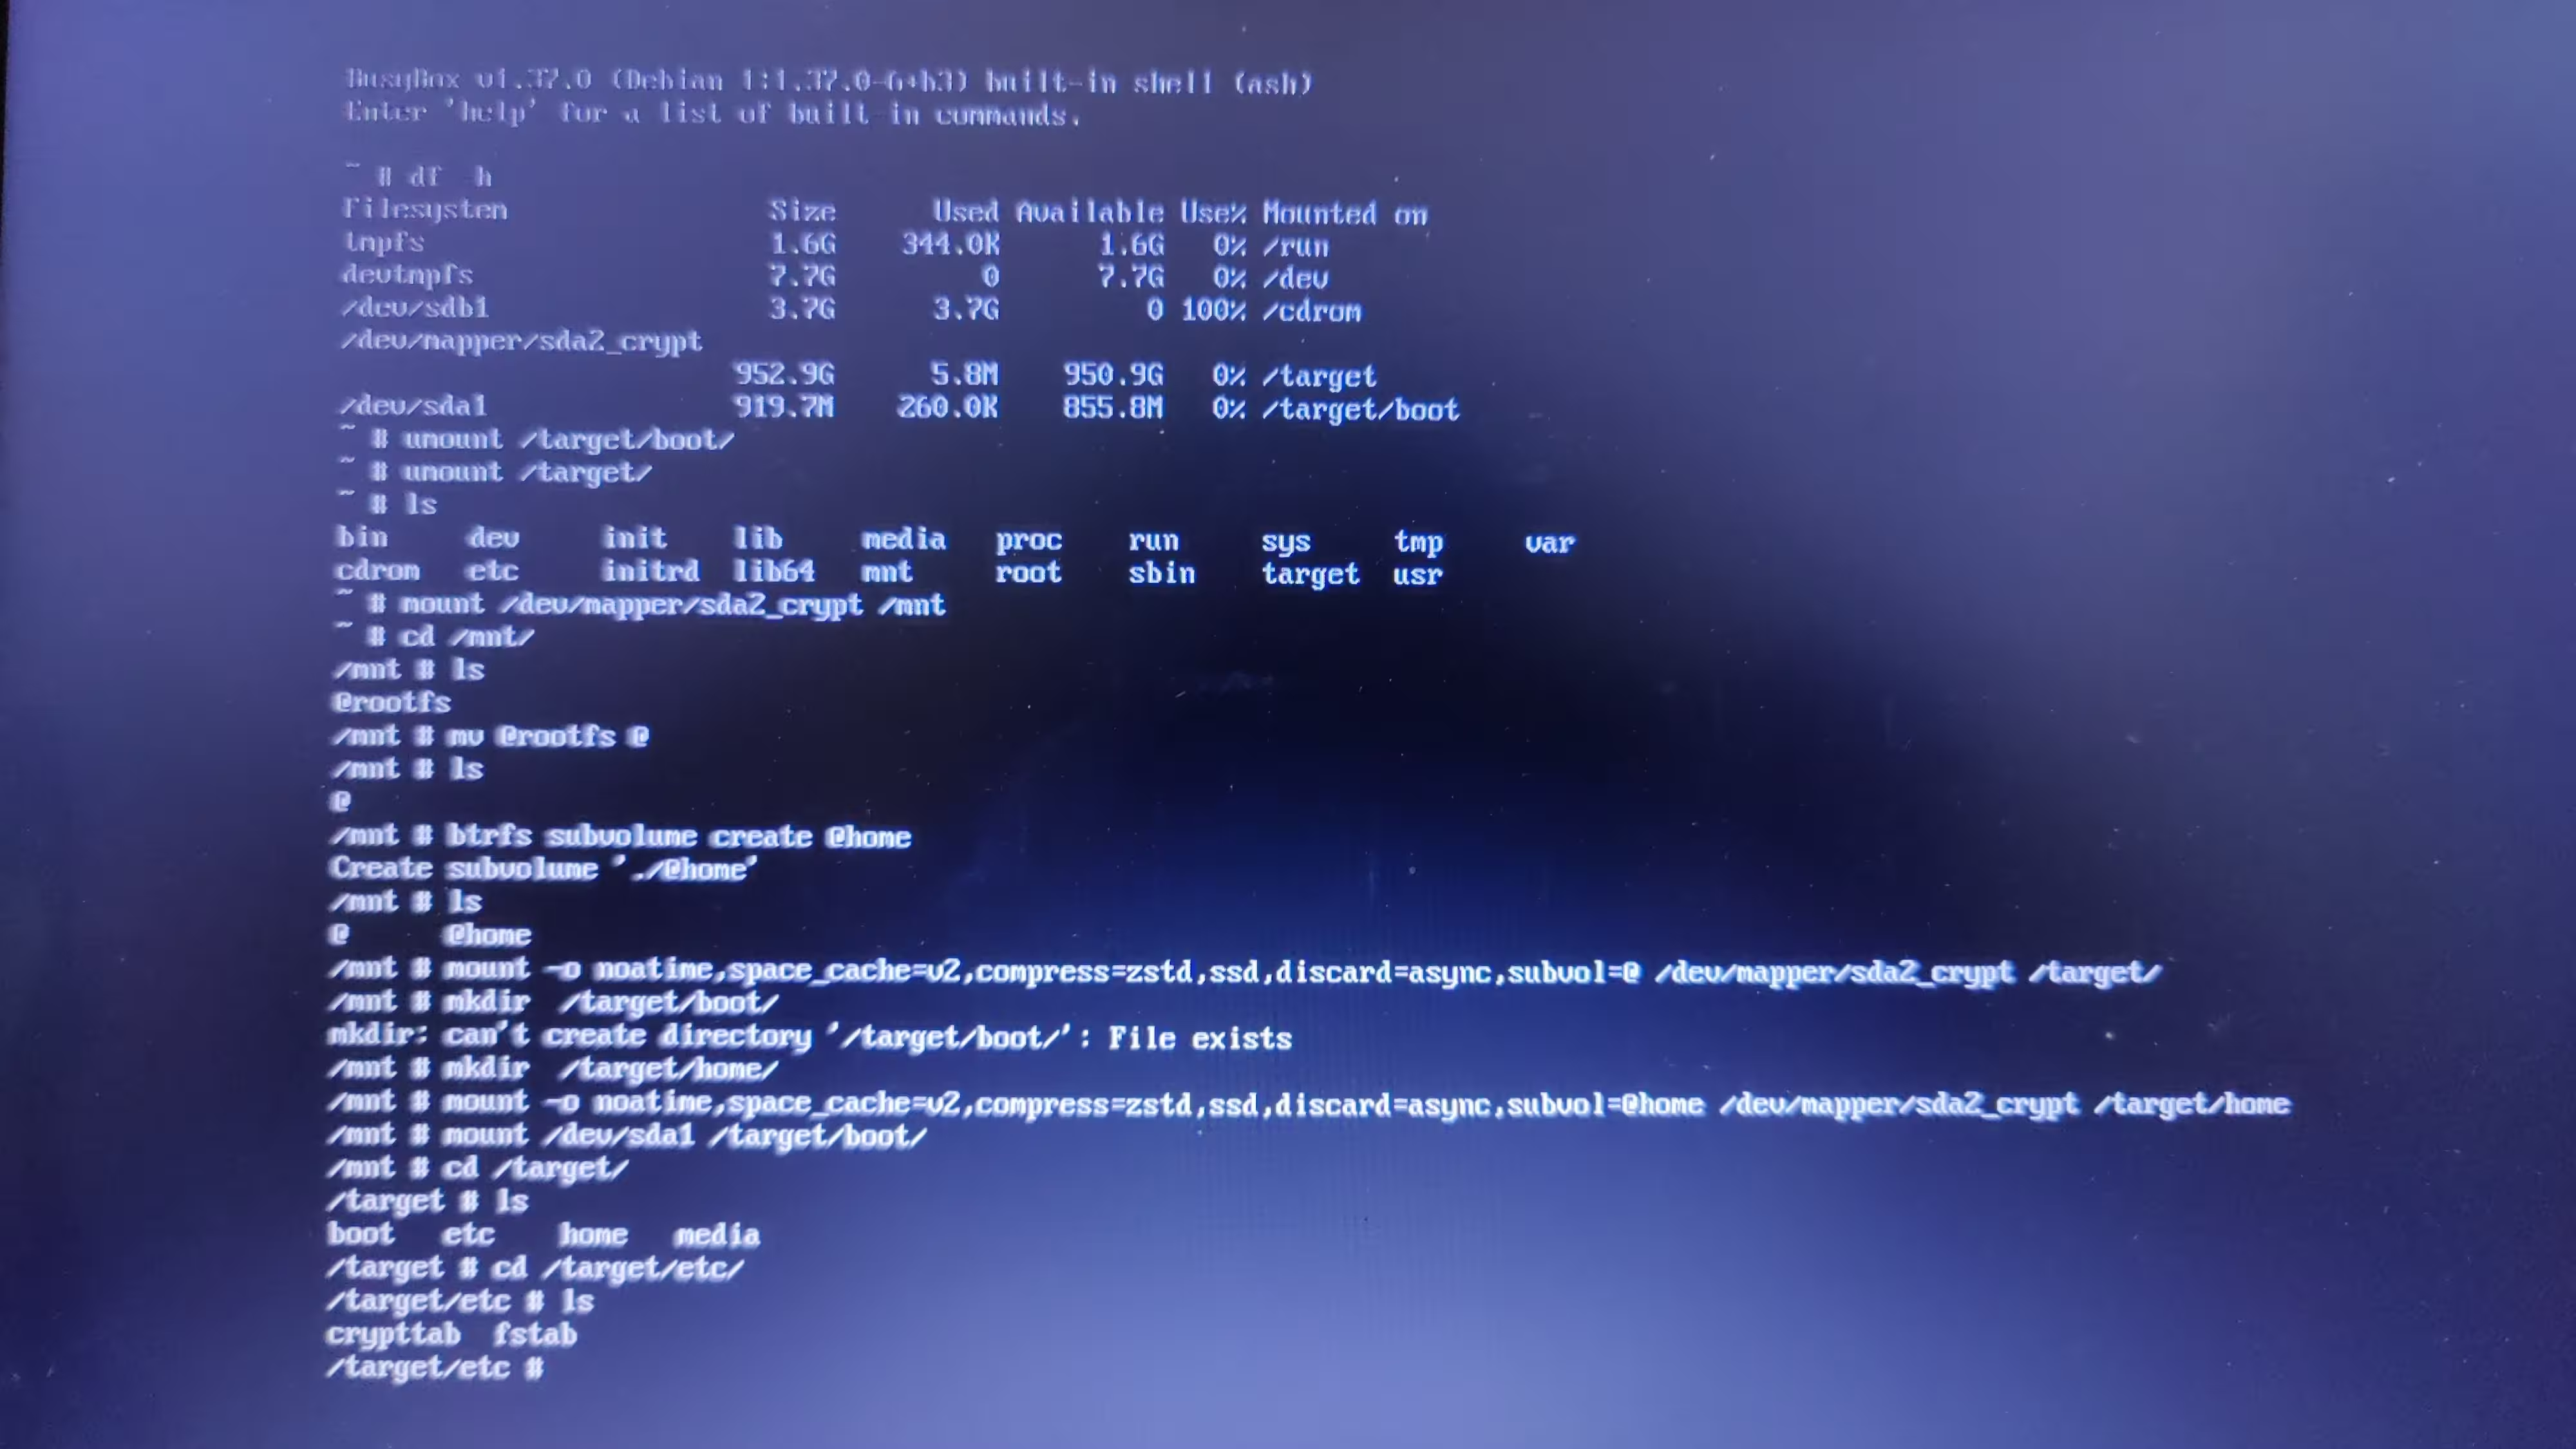
The screenshot above shows the steps I performed in the console. I followed the already mentioned video by EF Linux for this part and adapted it to my situation (he doesn’t encrypt the disk in his tutorial).
First we run df -h to have a look at how our disk is partitioned. In my case, the output was:
# df -h
Filesystem              Size  Used  Avail   Use% Mounted on
tmpfs                   1.6G  344.0K  1.6G    0% /run
devtmpfs                7.7G       0  7.7G   0% /dev
/dev/sdb1               3.7G    3.7G    0   100% /cdrom
/dev/mapper/sda2_crypt  952.9G  5.8G  950.9G  0% /target
/dev/sda1               919.7M  260.0K  855.8M  0% /target/boot
df -h shows us that /dev/mapper/sda2_crypt and /dev/sda1 are mounted on /target and /target/boot respectively.
Let’s unmount them. For that, we run:
# umount /target
# umount /target/boot
Next, let’s mount our root filesystem to /mnt.
# mount /dev/mapper/sda2_crypt /mnt
Let’s go into the /mnt directory.
# cd /mnt
Upon listing the contents of this directory, we get:
/mnt # ls
@rootfs
Debian installer has created a subvolume @rootfs automatically. However, we need the subvolumes to be @ and @home. Therefore, let’s rename the @rootfs subvolume to @.
/mnt # mv @rootfs @
Listing the contents of the directory again, we get:
/mnt # ls
@
We only one subvolume right now. Therefore, let us go ahead and create another subvolume @home.
/mnt # btrfs subvolume create @home
Create subvolume './@home'
If we perform ls now, we will see there are two subvolumes:
/mnt # ls
@ @home
Let us mount /dev/mapper/sda2_crypt to /target
/mnt # mount -o noatime,space_cache=v2,compress=zstd,ssd,discard=async,subvol=@ /dev/mapper/sda2_crypt /target/
Now we need to create a directory for /home.
/mnt # mkdir /target/home/
Now we mount the /home directory with subvol=@home option.
/mnt # mount -o noatime,space_cache=v2,compress=zstd,ssd,discard=async,subvol=@home /dev/mapper/sda2_crypt /target/home/
Now mount /dev/sda1 to /target/boot.
/mnt # mount /dev/sda1 /target/boot/
Now we need to add these options to the fstab file, which is located at /target/etc/fstab. Unfortunately, vim is not installed in this console. The only way to edit is Nano.
nano /target/etc/fstab

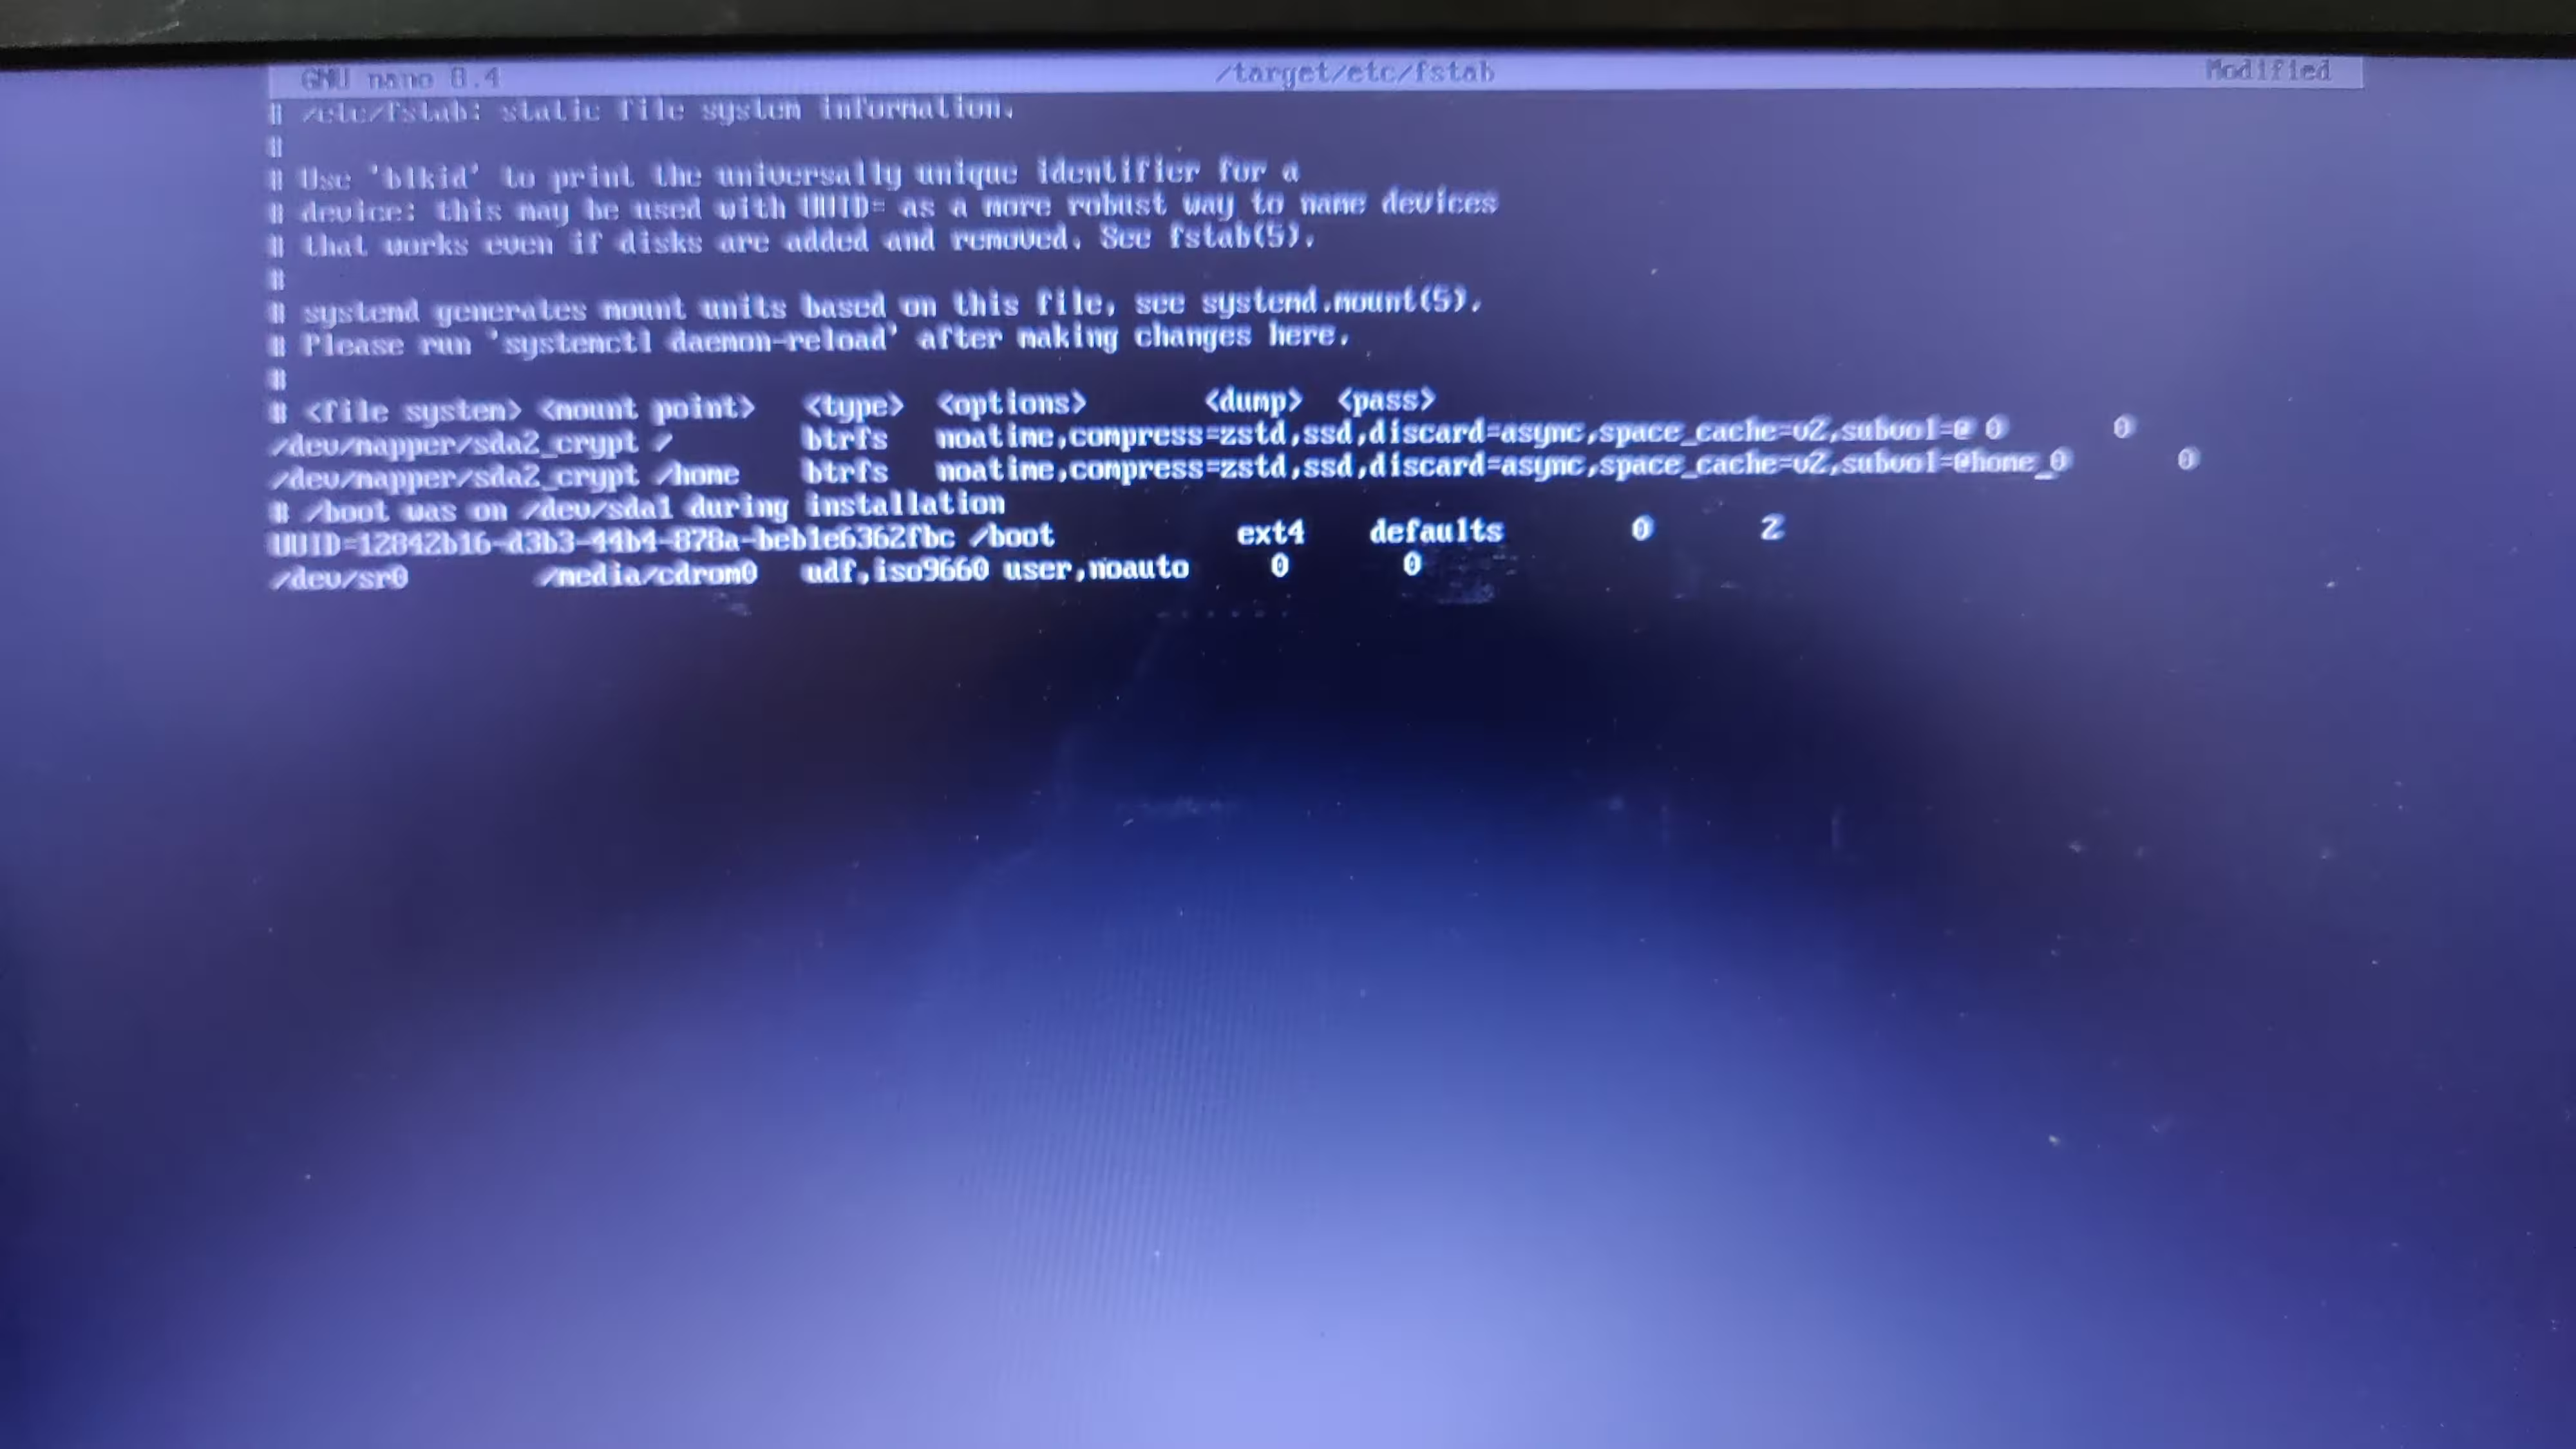
Edit your fstab file to look similar to the one in the screenshot above. I am pasting the fstab file contents below for easy reference.
# /etc/fstab: static file system information.
#
# Use 'blkid' to print the universally unique identifier for a
# device; this may be used with UUID= as a more robust way to name devices
# that works even if disks are added and removed. See fstab(5).
#
# systemd generates mount units based on this file, see systemd.mount(5).
# Please run 'systemctl daemon-reload' after making changes here.
#
# <file system> <mount point>   <type>  <options>       <dump>  <pass>
/dev/mapper/sda2_crypt /        btrfs   noatime,compress=zstd,ssd,discard=async,space_cache=v2,subvol=@ 0       0
/dev/mapper/sda2_crypt /home    btrfs   noatime,compress=zstd,ssd,discard=async,space_cache=v2,subvol=@home 0       0
# /boot was on /dev/sda1 during installation
UUID=12842b16-d3b3-44b4-878a-beb1e6362fbc /boot           ext4    defaults        0       2
/dev/sr0        /media/cdrom0   udf,iso9660 user,noauto     0       0
Please double check the fstab file before saving it. In Nano, you can press Ctrl+O followed by pressing Enter to save the file. Then press Ctrl+X to quit Nano. Now, preview the fstab file by running
cat /target/etc/fstab
and verify that the entries are correct, otherwise you will booted to an unusable and broken system after the installation is complete.
Next, press Screenshot of Debian installer installing the base system.Ctrl + Alt + F1 to go back to the installer.


linux-image-amd64.
After this, the installer will ask you a few more questions. For desktop environment, I chose KDE Plasma. You can choose the desktop environment as per your liking. I will not cover the rest of the installation process and assume that you were able to install from here.
Post installation
Let’s jump to our freshly installed Debian system. Since I created a root user, I added the user ravi to the suoders file (/etc/sudoers) so that ravi can run commands with sudo. Follow this if you would like to do the same.
Now we set up zram as swap. First, install zram-tools.
sudo apt install zram-tools
Now edit the file /etc/default/zramswap and make sure to have the following lines are uncommented:
ALGO=lz4
PERCENT=50
Now, run
sudo systemctl restart zramswap
If you run lsblk now, you should see the below-mentioned entry in the output:
zram0 253:0 0 7.8G 0 disk [SWAP]
This shows us that zram has been activated as swap.
Now we install timeshift, which can be done by running
sudo apt install timeshift
After the installation is complete, run Timeshift and schedule snapshots as you please. We are done now. Hope the tutorial was helpful.
See you in the next post and let me know if you have any suggestions and questions on this tutorial.